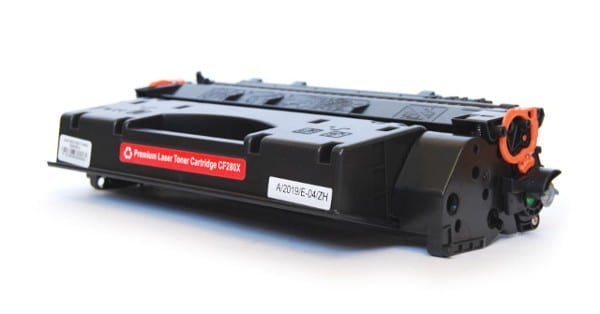
How many pages does HP printer ink last?

When it comes to printing, one of the most common concerns for users is the longevity of printer ink. Specifically, for users of HP printers, understanding how long their ink cartridges will last is essential for budgeting, planning, and avoiding unexpected interruptions during critical print jobs. In this article, we will delve into the factors that influence the lifespan of HP printer ink and provide you with a comprehensive analysis of how many pages you can expect to print before needing to replace your ink cartridges.

Factors Affecting HP Printer Ink Longevity:

  1. Cartridge Capacity: HP printer ink cartridges come in different sizes, typically ranging from standard to high-yield or XL options. The capacity of the ink cartridge directly impacts the number of pages it can print before running out of ink. High-yield cartridges contain more ink and can therefore print a higher number of pages compared to standard-sized cartridges.
  2. Print Coverage: The amount of ink used per page greatly depends on the print coverage, which refers to the proportion of the page covered with ink. Pages with heavy graphics or images will consume more ink compared to pages with predominantly text. Therefore, the nature of your print jobs significantly influences how long the ink will last.
  3. Print Quality Settings: HP printers often provide users with the option to select different print quality settings, such as draft, normal, or high-quality modes. Higher-quality print settings tend to use more ink to achieve sharper and more vibrant results. Opting for lower-quality settings can help conserve ink and extend its lifespan.
  4. Ink Consumption: Ink consumption can also vary depending on the specific model of HP printer you are using. Different printer models may employ varying technologies that affect how efficiently ink is used during the printing process. Newer printer models often feature improved ink utilization techniques, resulting in longer-lasting ink.
  5. Printer Maintenance: Regular maintenance of your HP printer, such as printhead cleaning, can positively impact the ink’s longevity. Proper maintenance helps prevent clogs or misfires, ensuring that ink is used optimally and reducing the likelihood of wasted ink.

Estimating the Number of Pages Printed per Ink Cartridge: To provide you with a general idea of how many pages you can expect to print with an HP ink cartridge, let’s consider some typical figures:

  1. Standard-Sized Cartridges: On average, a standard-sized HP ink cartridge can print around 150-300 pages. However, this estimation can vary depending on the factors mentioned earlier. Higher print coverage, higher-quality settings, and certain printer models may reduce the number of pages achievable.
  2. High-Yield or XL Cartridges: HP’s high-yield or XL ink cartridges contain more ink than their standard counterparts, allowing for greater page yields. Typically, these cartridges can print around 400-800 pages. Again, this estimate depends on the print coverage and other influencing factors.

It is important to note that these numbers are approximate and intended as general guidelines. The actual number of pages you can print may deviate from these estimates due to various factors.

Tips for Extending Ink Cartridge Life: To maximize the lifespan of your HP printer ink cartridges, consider implementing the following practices:

  1. Print in draft mode whenever feasible, especially for non-critical documents or drafts.
  2. Optimize print settings to reduce the amount of ink used without compromising legibility or quality.
  3. Minimize unnecessary color printing and stick to black and white whenever possible, as color ink is typically consumed at a faster rate.
  4. Regularly maintain your printer, following the manufacturer’s guidelines for cleaning and upkeep.
  5. Preview your print jobs before finalizing to avoid unnecessary reprints and conserve ink.
How do I clean the rollers in my Brother printer?

Printers are an essential tool for many individuals and businesses, enabling the efficient creation of documents and images. Brother printers, renowned for their reliability and performance, are widely used across the globe. However, over time, printers may encounter issues with paper feeding or printing quality, often caused by dirty or worn-out rollers. Regular maintenance, including cleaning the rollers, can significantly enhance the longevity and functionality of your Brother printer. In this comprehensive guide, we will walk you through the process of cleaning the rollers, ensuring optimal performance and print results.

Step 1: Preparing for the Cleaning Process Before initiating the roller cleaning procedure, it is crucial to ensure safety and efficiency. Here are the necessary preparations:

  1. Turn off the Printer: Always start by switching off your Brother printer and unplugging it from the power source. This precautionary measure eliminates the risk of electrical shocks and other accidents during the cleaning process.
  2. Gather Cleaning Materials: To clean the rollers effectively, gather the following supplies: lint-free cloths, clean water, isopropyl alcohol (70% concentration), cotton swabs, and a tray or container.

Step 2: Accessing the Rollers Once you have prepared the cleaning materials, follow these steps to access the rollers of your Brother printer:

  1. Open the Printer Cover: Lift the printer cover to expose the internal components. In some Brother printer models, this can be done by lifting the top lid, while others have front-panel covers that swing open.
  2. Locate the Rollers: After opening the printer cover, identify the rollers. They are generally rubber or rubber-like cylinders positioned near the paper tray or cartridge area. Refer to your printer’s user manual for precise roller locations specific to your model.

Step 3: Cleaning the Rollers Now that you have accessed the rollers, let’s proceed with the cleaning process:

  1. Remove Loose Debris: Gently inspect the rollers for any loose debris, such as paper dust or tiny paper fragments. Use a lint-free cloth or a soft brush to remove this debris. Avoid using sharp or abrasive tools that could damage the rollers.
  2. Dampen a Cloth: Moisten a lint-free cloth with clean water. Ensure the cloth is not excessively wet, as excessive moisture can damage the printer. Squeeze out any excess water before proceeding.
  3. Clean the Rollers: Hold the dampened cloth against the rollers and rotate them manually. Apply gentle pressure to effectively clean the surfaces. Continue rotating the rollers until you have cleaned the entire circumference of each roller. This process helps remove ink residue, dust, and other contaminants that might affect print quality.
  4. Remove Stubborn Stains: If some stains or residue persist, dampen a cotton swab with isopropyl alcohol. Gently rub the stained areas to dissolve and remove the residue. Ensure that the cotton swab is only slightly damp, as excessive alcohol can damage the rubber surface of the rollers.
  5. Dry the Rollers: Once the cleaning is complete, allow the rollers to air dry naturally. Ensure that they are completely dry before reinstalling them back into the printer.

Step 4: Reassembling the Printer After the rollers have dried, it’s time to reassemble the printer:

  1. Close the Printer Cover: Carefully close the printer cover, ensuring that it is properly aligned and latches securely.
  2. Plug in and Power On: Connect the printer to the power source and turn it on. Give the printer a few moments to initialize.

Step 5: Test Print and Maintenance To ensure the cleaning process was successful, perform a test print. If the print quality has improved and the paper feeding issues are resolved, you can consider the cleaning process successful. However, if the issues persist, you may need to repeat the cleaning procedure or seek further assistance from Brother’s customer support or a professional printer technician.

Maintenance Tips: To maintain optimal printer performance, consider the following tips:

  1. Regular Cleaning: Make it a habit to clean the rollers every few months or whenever you notice a decline in print quality or paper feeding issues. Regular maintenance can prevent excessive buildup of dust, ink, or debris on the rollers.
  2. Proper Storage: If you anticipate a prolonged period of printer inactivity, such as during vacations or office closures, it is advisable to store the printer in a dust-free environment. Cover it with a protective cloth or place it in a printer dust cover to minimize dust accumulation on the rollers and other components.
  3. Use High-Quality Paper: Low-quality or damaged paper can leave residue or fibers on the rollers, impacting print quality. Invest in good-quality paper suitable for your printer model to reduce the risk of roller contamination.
  4. Avoid Overloading the Paper Tray: Overfilling the paper tray can put excessive pressure on the rollers, leading to misfeeds or jams. Ensure that you adhere to the printer’s recommended paper capacity to maintain smooth paper feeding.

What is an ADF in a printer?

In the world of modern printing technology, efficiency and convenience play a vital role in meeting the demands of fast-paced environments. One significant feature that enhances productivity in printers is the Automatic Document Feeder (ADF). An ADF is a specialized component that simplifies the process of scanning, copying, and faxing multiple pages without manual intervention. In this article, we will delve into the details of what an ADF is, how it works, and its benefits in various printing applications.

What is an ADF? An Automatic Document Feeder (ADF) is a mechanical device integrated into printers and multifunction devices. Its primary purpose is to automate the handling of multiple sheets of paper, eliminating the need for manual page placement and scanning. The ADF allows for continuous document processing, improving productivity and reducing the time and effort required for large-volume scanning tasks.

How does an ADF work? ADF mechanisms consist of several key components that work in harmony to accomplish the task of automatically feeding documents. Here’s a breakdown of the main parts and their functions:

  1. Paper Tray: The ADF is equipped with a paper tray that holds a stack of documents. The capacity varies depending on the printer model, with some ADFs capable of accommodating hundreds of sheets at a time.
  2. Document Separator: Located at the entrance of the ADF, the document separator ensures that only one sheet is fed into the scanning mechanism at a time. It prevents multiple sheets from being pulled in simultaneously, reducing the risk of paper jams.
  3. Rollers: Inside the ADF, a set of rubber or silicone rollers is responsible for picking up and advancing the paper through the scanning path. The rollers rotate to feed the topmost sheet into the scanning or copying area while holding the remaining pages in place.
  4. Optical Sensors: Optical sensors are strategically placed within the ADF to detect the presence and position of documents. These sensors allow the printer to determine when a page has been successfully fed, and if necessary, signal the user in case of any issues such as double feeds or empty trays.
  5. Exit Tray: Once the scanning process is complete, the documents are ejected onto the exit tray, ready for retrieval or further processing.

Benefits of ADFs: The integration of an ADF in printers offers numerous advantages for both home and office users. Here are some key benefits:

  1. Time Efficiency: ADFs save considerable time and effort by automatically handling multiple pages, eliminating the need for manual page-by-page placement.
  2. Increased Productivity: ADFs enable unattended operation, allowing users to queue large document sets for scanning, copying, or faxing. This feature is particularly valuable in busy environments where time is of the essence.
  3. Reduced Risk of Errors: Manual document feeding increases the likelihood of misalignment, skipped pages, or feeding errors. ADFs minimize such risks, ensuring accurate and consistent results.
  4. Versatility: ADFs are designed to handle a variety of document types, including single-sided and double-sided pages, varying sizes, and even delicate or fragile sheets. This versatility enhances the overall usability and compatibility of the printer.
  5. Space Optimization: ADFs help streamline workflow by eliminating the need for additional external document feeders or flatbed scanners, saving valuable workspace.

How do I turn off offline mode on my printer?

Printers have become an essential part of our daily lives, helping us transform digital documents into tangible copies. However, there are instances when printers may go into offline mode, causing frustration and hindering productivity. In this article, we will guide you through the process of turning off offline mode on your printer, enabling you to resume printing effortlessly.

Step 1: Check the Printer Connection The first and foremost step is to ensure that your printer is properly connected to your computer or network. Verify the USB cable connections or the wireless network connection, depending on the type of printer you own. If you find any loose or disconnected cables, securely reconnect them to the appropriate ports.

Step 2: Restart Your Printer Often, a simple restart can resolve many technical issues, including the offline mode. Power off your printer by pressing the power button, and then unplug it from the power source. Leave it unplugged for about 30 seconds to a minute. Afterward, plug it back in and power it on. Allow the printer to initialize completely.

Step 3: Check Printer Status Open the Control Panel on your computer and navigate to the “Devices and Printers” section. Locate your printer in the list of installed devices and right-click on it. From the context menu, select “See what’s printing” or “Printer properties.” This will open the printer’s queue and status window.

Step 4: Clear Print Queue In the printer’s queue and status window, click on the “Printer” menu located in the top left corner. From the dropdown menu, choose “Cancel All Documents” to clear the print queue. This will remove any pending print jobs that may be causing the offline status.

Step 5: Set Printer Online Once the print queue is cleared, navigate back to the printer’s queue and status window. Right-click anywhere within the window and select “Printer” from the context menu. Uncheck the option that says “Use Printer Offline” or “Pause Printing” if it is checked. This action will bring your printer back online.

Step 6: Update Printer Drivers Outdated or incompatible printer drivers can often lead to offline issues. Visit the manufacturer’s website for your printer model and download the latest drivers available. Install the updated drivers on your computer, following the provided instructions. Updated drivers can help resolve compatibility issues and ensure optimal printer performance.

Step 7: Restart Your Computer After updating the printer drivers, it is recommended to restart your computer. Rebooting your system will allow the changes to take effect and refresh the connection between your computer and the printer. Once your computer restarts, try printing a test page to confirm if the printer is no longer in offline mode.